# Bots
# Create a bot from a bot template
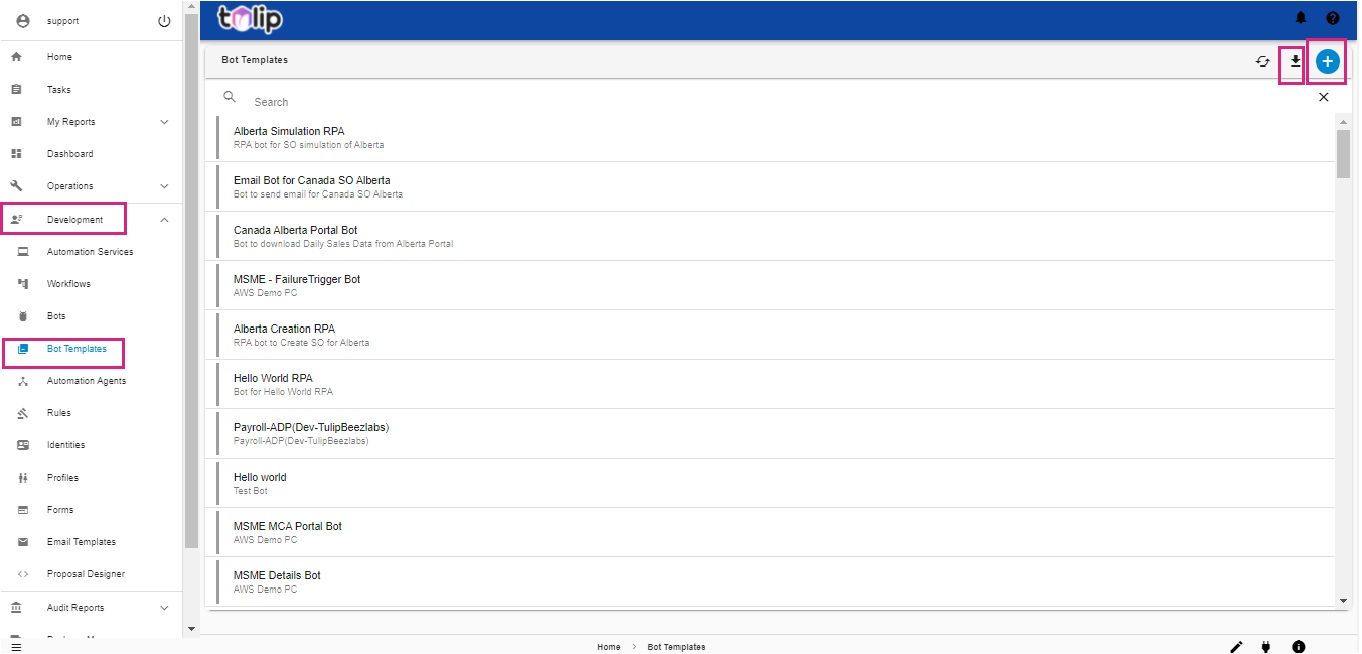
In order to create a bot, we must first create a bot template. Under Bot Template in Development, click on the Create icon. Alternatively you can also import an already existing bot by clicking on the Import option.
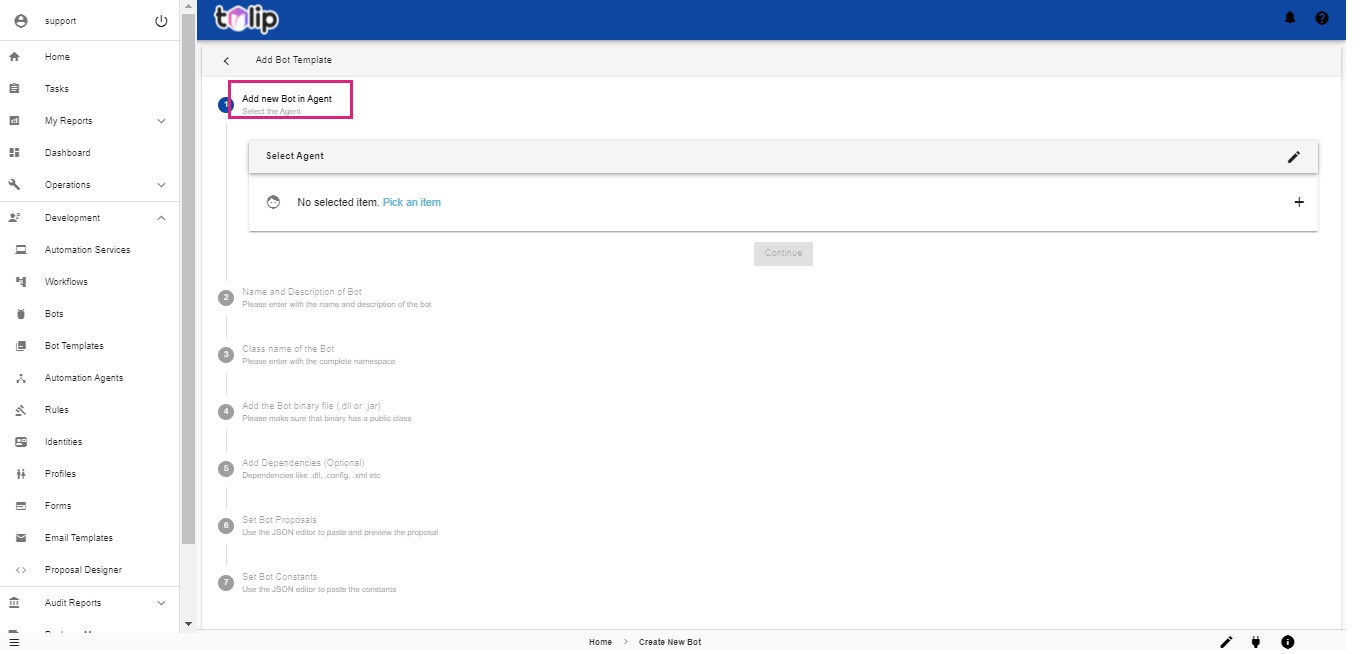
Now perform the following steps:
- Select an agent. There is an available list of existing Automation Agents here. You have to select from that
- Now give the name amd description of the bot
- Enter the class name of the bot. This is the class name from the bot binary file
- Add in the bot binary file which may be a .dll file or a .jar file. Make sure the binary file has a public class
- Add Dependencies like .dll, .config and .xml files
- Set the Bot Input proposals by making use of Proposal Designer
- Set the Bot Constants. Use JSON editor to paste the constants
- Click on Create. Now the bot template is created and added to the list of Bot Templates
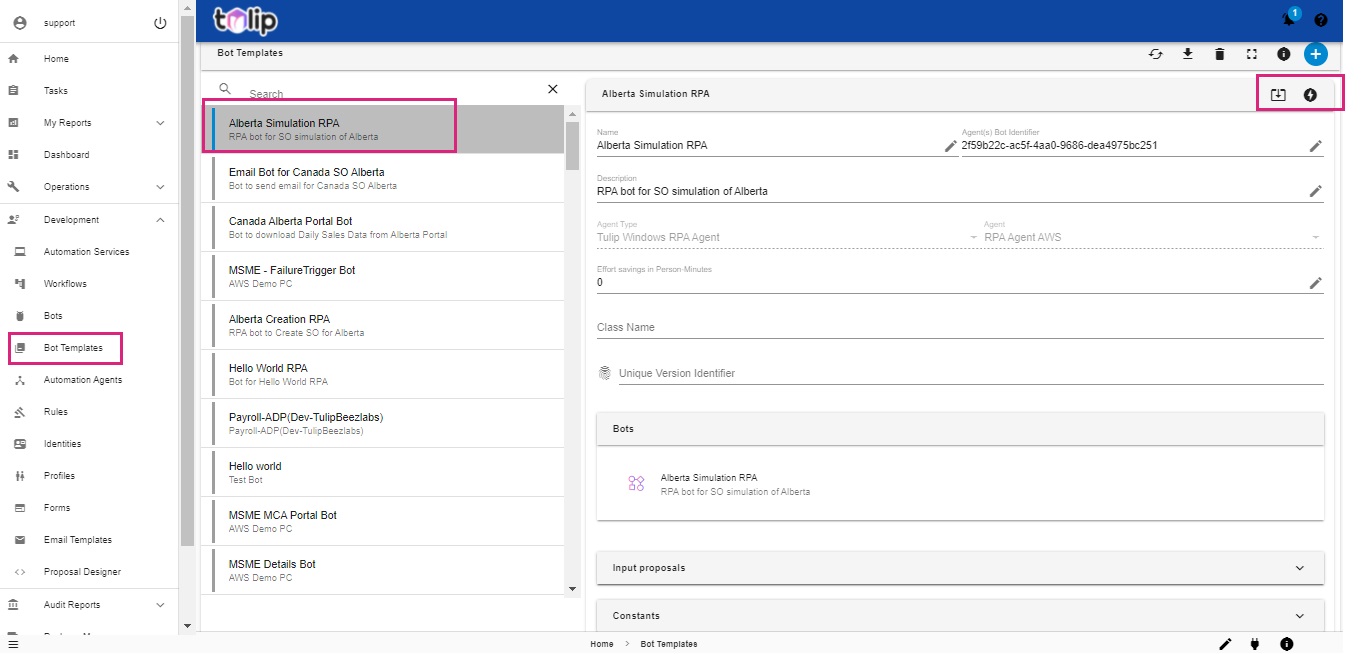
You can edit the properties by selecting the desired Bot Template from the lisy of Bot Templates. Please note that whenever you edit the properties you must Update the Bot created by clicking on the Update option at the top corner.
Once the bot template is ready please click on Incubate option at the top corner in order to incubate and create the Bot.
# Fill details of bot
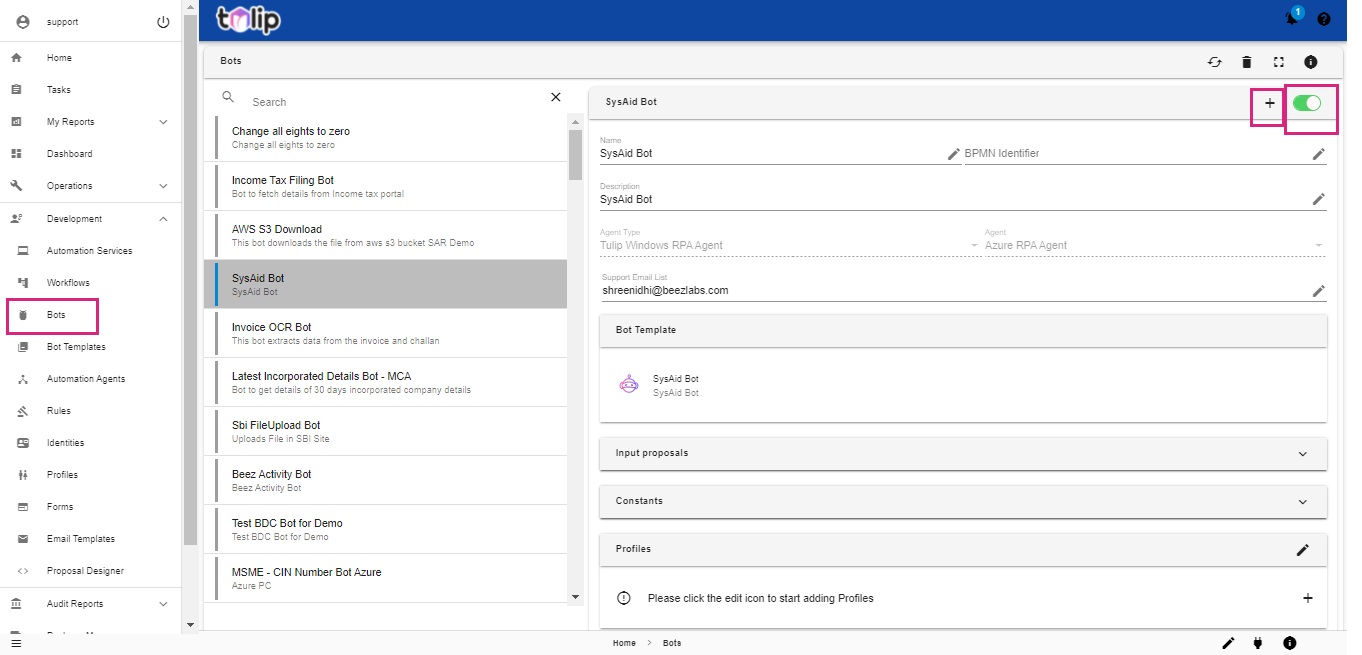
Once the bot is incubated, you can find the created Bot under the list in Bots of Development. Now you can further fill in details/ edit details.
Note: The fields like Name, BPMN identifier, Description, Support Email List, Input proposals, Constants, Profiles and Identities are editable.
Now activate the bot. Use the Toggle option for this.
Note: You can now trigger or schedule this bot from the Dashboard. Know how
# Convert to Automation Service
Finally, you can register the bot as an automation service by clicking on the + icon at the top right corner.
Note: Only after the bot is incorporated as an automation service, can the automation service be enabled to experience the functionality.
How to do this? Click here